
Reference 2 by Mastering The Mix
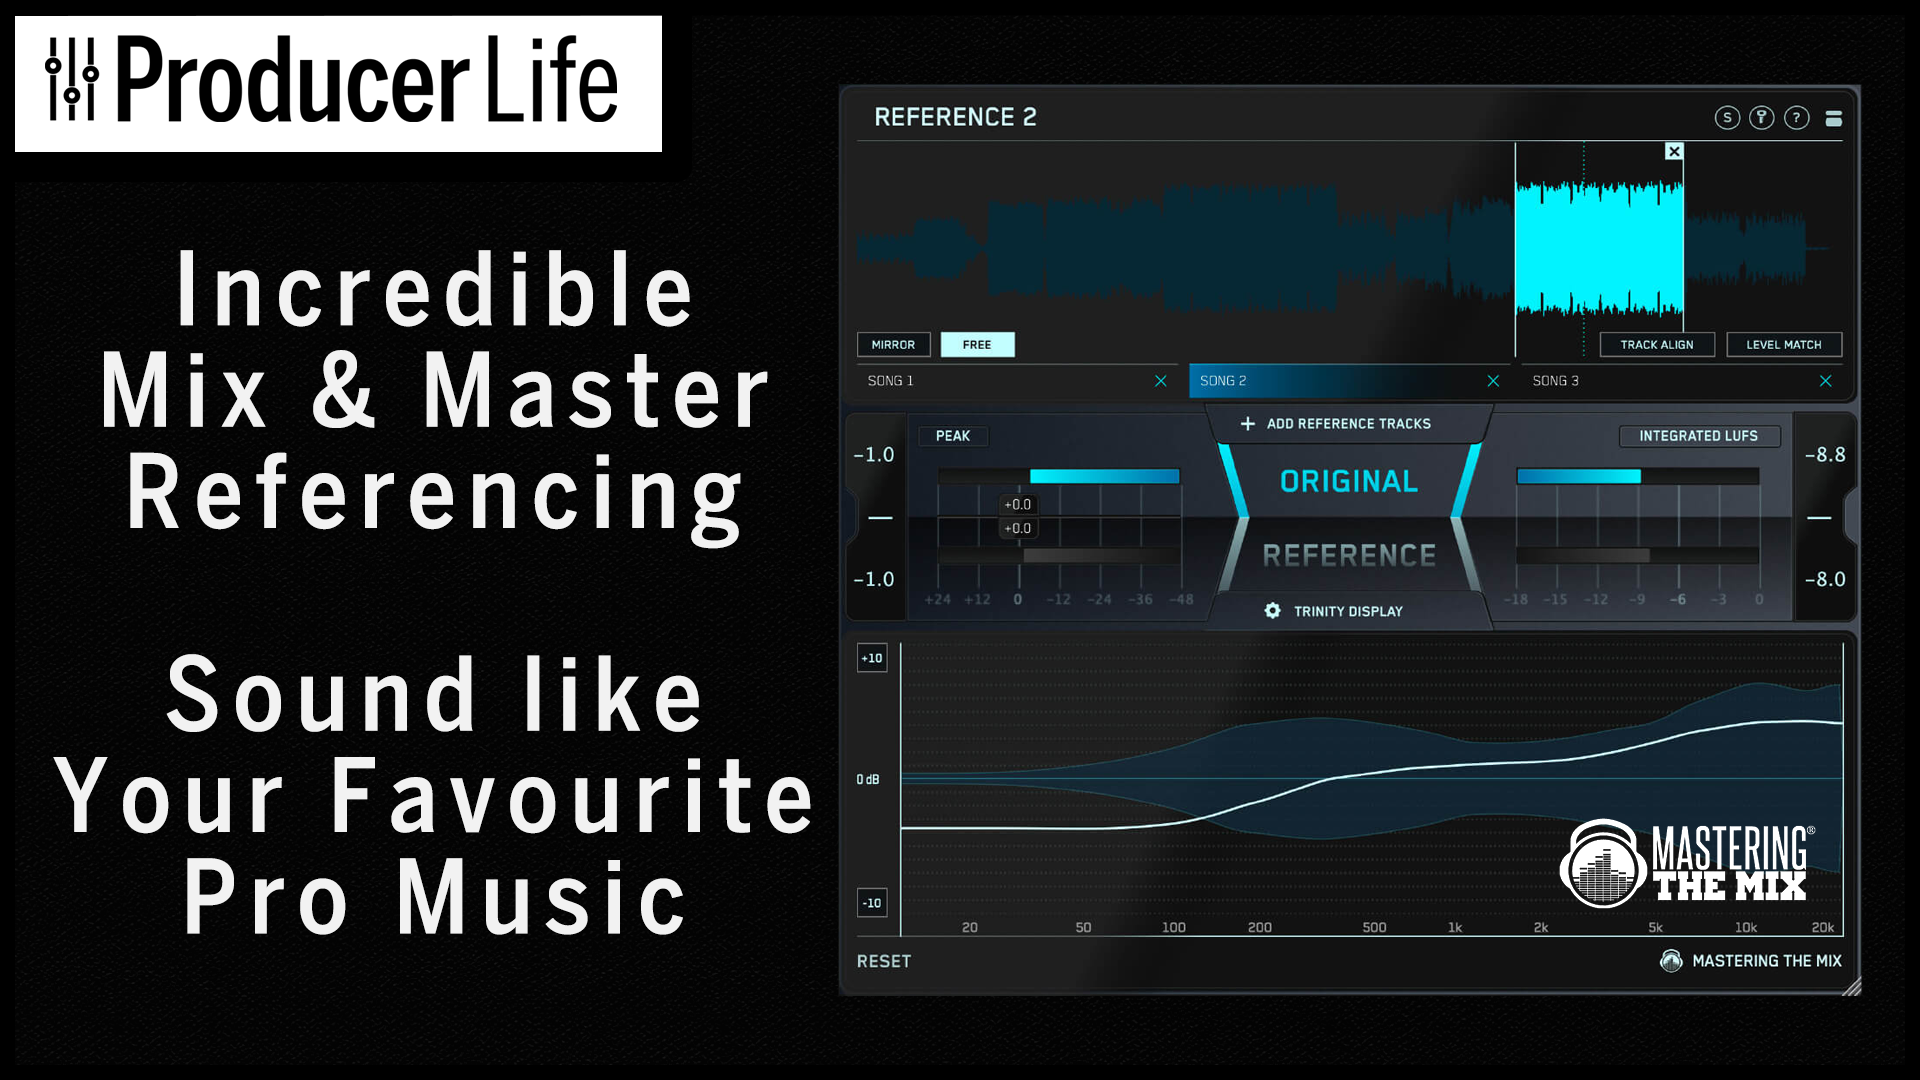
Reference 2 by Mastering The Mix is a comprehensive analysis tool that is focused on referencing audio tracks. Comparing your music to that of others is crucial in nailing a good mixdown and master. You might listen to a similar artist or song as a reference, comparing elements like how strong the bass is, or how punchy the transients are. Reference 2 helps you compare up to 12 different tracks and comes with some fantastic tools to help you compare your songs with those of the biggest artists on the scene.
Using clever visual feedback and analysis, Reference helps you make better and more informed decisions about your mixdown. I really like how the plugin makes suggestions for you, especially with the EQ section. The loudness controls keeping everything at the same perceived volume is extremely useful, especially the setting where you can play all tracks at -14lufs, pretty standard for streaming services. Stereo width analysis, clear and resizable interface, and many more features. There is plenty here to really help you level up your mixdowns and get them sounding more like the pros.
Watch the video to check out Reference 2 on our YouTube channel. Or keep reading for more features below.
You can grab a copy here: https://bit.ly/Ref2MTM (Plugin Boutique)
GET CLOSER TO THE SOUND OF YOUR FAVORITE MIXES
Using reference tracks is essential if you want to create pro-sounding music that translates well on all playback systems. REFERENCE 2 is the ultimate referencing tool and will help you get closer than ever to the sound of your favourite tracks.
REFERENCE 2 makes matching the EQ balance, stereo width, compression, and loudness of your reference tracks simple. It does this by giving you the clear, and actionable insights you need to get your music sounding great and ready for release.
Key Benefits
- Compare your mix or master to up to 12 reference tracks and create multiple loops so you can quickly compare various sections of your track to your reference.
- Instantly and accurately match the loudness of your track and your references. This is crucial for a fair comparison and for making informed decisions on how to shape your sound.
- Visual and actionable insights to make matching the true peak, loudness, EQ balance, punch, and stereo width of your reference tracks easier than ever.
- Includes an additional source plugin called REFSEND that allows you to bypass entire FX chains to make loudness-matched A/B comparisons.
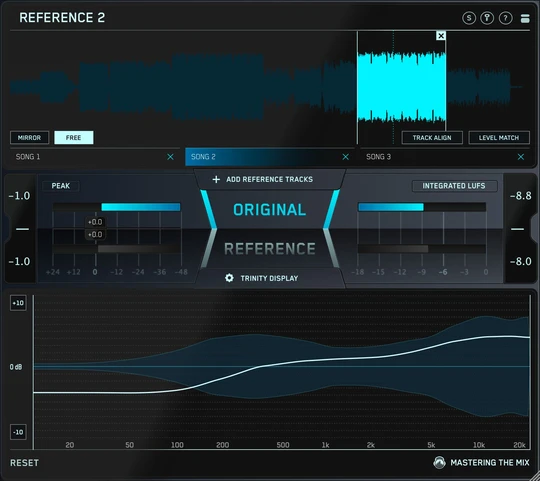

How To Use REFERENCE 2
Where To Load REFERENCE
To get started, load an instance of REFERENCE on the master bus of your project. REFERENCE should go after your metering plugin but before any headphone or speaker correction.
Add A Reference
There are two ways to load reference tracks. You can either click ‘Add Reference Tracks’ and select the files from your computer or drag and drop your files onto the Wave Transport.
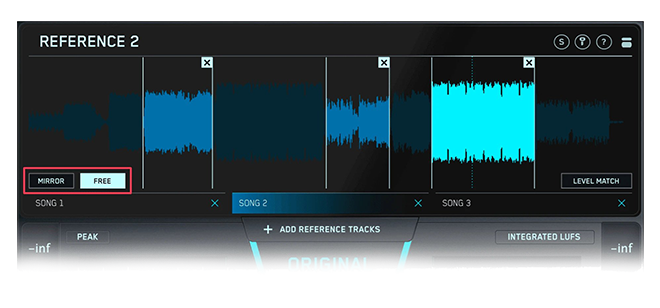
After loading your reference tracks, you will see the MIRROR and FREE buttons in the bottom left corner of the Wave Transport,.
When FREE is activated, you can navigate to any part of your reference track by clicking on the waveform.
MIRROR will match the playback location of your reference to your DAWs transport. This is useful for when you have a different version of the same track you’re working on and want to seamlessly jump between the versions at the same point in the song.
You can create loops in FREE mode. To create a loop, select and drag over the part of the waveform you wish to loop. Loop endpoints are automatically shifted to the nearest beat. You can create as many loops as you want. After creating a loop, click anywhere within the loop to activate it. Adjust a loop by dragging the loop lines and delete it by clicking the cross.
Level Match
In the bottom right corner of the Wave Transport, you will see the Level Match button. When selected, this will accurately match the perceived loudness of the track you are working on and your reference tracks.
This is an absolutely crucial stage in comparing audio. Louder sounds give humans the illusion that they have a fuller bass and more clarity in the high frequencies. By level matching, you’ll be able to compare the tracks fairly and make mixing decisions with confidence.
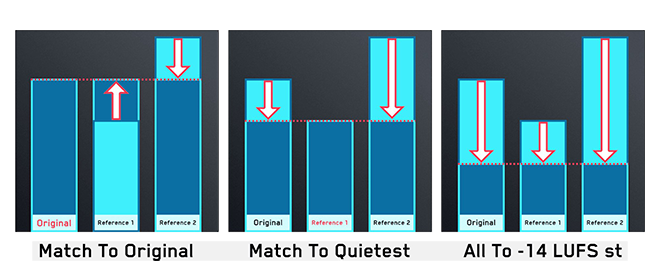
The default option is to match your reference tracks to the volume of the original track you’re working on. You can also match the loudness to the quietest track, whether it’s the original or a reference track, to ensure safe headroom. The third option is to match all tracks to -14LUFS short-term which is comparable to the loudness normalization found on popular music streaming sites. You also have control over whether you match the loudness of individual tracks or all tracks.
Gain Insights
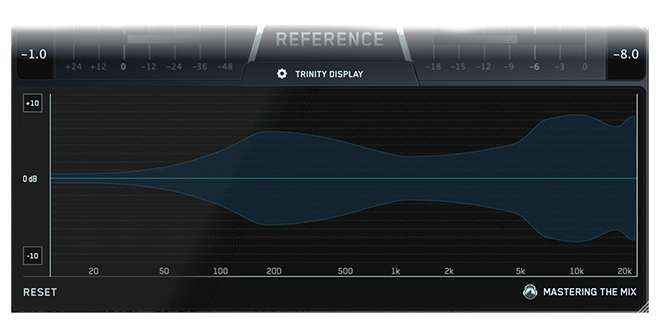
The visuals in the Trinity Display show you how your EQ balance, stereo width and compression compares to your reference track. You can also click to solo a frequency band allowing you to zone in on the intricate differences between your mix and your references.
Level Line
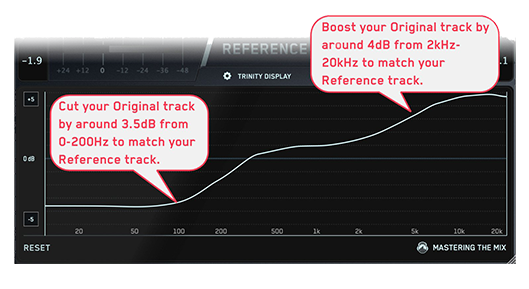
The white Level Line tells you how the EQ balance of your original song differs from your reference track. The Trinity Display has a thin, faint line through the middle. This represents 0dB. Use an EQ to match the level line curve to get your music sounding like your selected reference track. Boost where the level line is above 0dB and cut where the level line is below 0dB.
What makes the Level Line completely unique and so useful? Trying to get your mix or master to match the frequency spectrum of a reference track simply will not work. This is because there are so many variables that affect how a track sounds (such as instruments, tuning, performance, samples, etc). The Level Line uses a complex algorithm created to specifically identify how the human ear perceives certain frequencies relative to the balance of the whole mix.
The Level Line algorithm has 3 refresh modes, short, medium and integrated. With the short refresh mode, the Level Line updates over a 3-second period based on how your current EQ balance compares with your reference. The medium refresh mode updates over 10 seconds. With both short and medium refresh modes, you don’t need to click reset for the level line to reflect changes made to the EQ of your track. The third option, ‘integrated’, accumulates input analysis data constantly. This gives a move stable reading but we advise that you click reset after any EQ changes are made to your track. You can select your Level Line mode preference in settings.
Stereo Width
The Stereo Width shows you how wide the audio is across the entire frequency range of either the original track you’re working on or your reference.
Understanding the stereo spread of both your original track and your reference will help you get closer to the sound you want. You can use panning in your DAW or a stereo tool to reduce or increase the width of a specific frequency range in your track.
Punch Dots
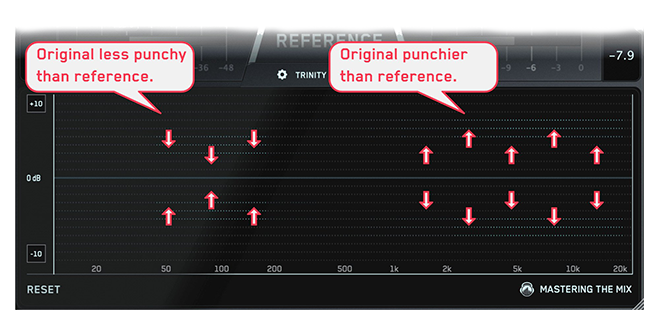
The Punch Dots in the Trinity Display will tell you how the short-term dynamic range of your track compares to the short-term dynamic range of your reference.
The Punch Dots will move towards the 0dB line if that frequency band is more compressed in your original than in the corresponding frequency range of your reference.
The Punch Dots will move away from the 0dB Line if that frequency range is less compressed in your original than in the corresponding frequency range of your reference. The more opaque the dots are the larger the difference between the punch of your track and the punch of the reference.
In the example below, we can see that the low-end from around 50-200Hz is showing the Punch Dots moving towards the 0dB line. This tells us that our original track has more compression in the low frequencies than the reference track. This might prompt us to reduce the compression on our kick or bass elements.
We can also see that from 200-1.5kHz the Punch Dots are barely visible. This means our original track has a similar amount of compression to our reference.
Finally, we can see that from 1.5kHz to 20kHz, the Punch Dots are moving away from the 0dB line. This means that the high frequencies are punchier in our track than in the reference. We may decide to compress these transients using a multi-band compressor, or we might decide that we actually like the punchy top end and leave it just as it is.
Plus:
- Solo part of the frequency spectrum click anywhere inside the Trinity Display.
- The Trinity Display has 4 different scales, ±5dB, ±10dB, ±15dB and ±20dB.
- The Trinity Display was designed so you can easily see all three visuals simultaneously, but you can choose what visuals are enabled and disabled in the Trinity Display settings located just above the Trinity Display.
- Create and recall presets using the plugin wrapper in your DAW.
REFSEND
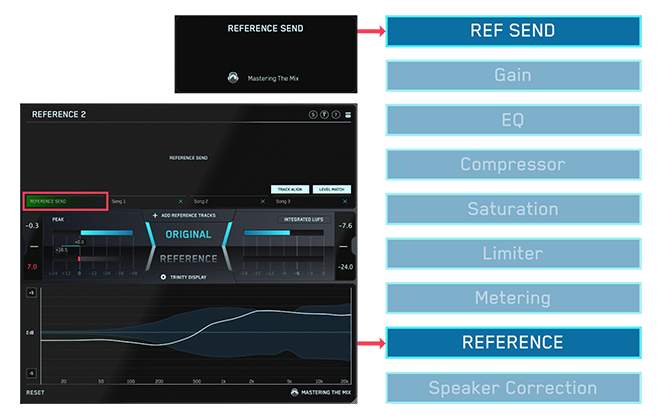
REFSEND is an additional plugin installed alongside REFERENCE that allows you to send audio to REFERENCE from within your DAW. This can be useful for when you want to hear the before and after effect of a plugin, an FX chain, or even your entire mastering chain.
Load up an instance of REFSEND in your DAW before the plugins that you want to A/B test. Ensure REFERENCE is instantiated after the plugins that you want to A/B test. Once REFSEND is instantiated, you’ll see a new Track Tab automatically appear labelled ‘REFERENCE SEND’. Select this Track Tab and toggle the Original and Reference buttons to A/B test.
You can use all of REFERENCE’s tools and insights with REFSEND, such as Level Match, Track Align, as well as the metering and all Trinity Display visuals.
Reference 2 Vids & Links
If you would like to grab Reference 2 by Mastering The Mix, then please check it out using this link, which helps support Producer Life, thank you. Check the video from our YouTube channel showing Reference 2 in action.
https://bit.ly/Ref2MTM

